A Mehndi Artist's Tips for Perfect Wedding Henna Every Time
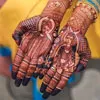
Bridal mehndi turns a wedding into a vibrant celebration. In cultures across South Asia and the Middle East, this ancient art adorns the bride's hands and feet with intricate patterns that symbolize joy, love, and protection. But the pressure is on—everyone expects that deep, lasting stain that lasts through the festivities. As Raju Mehandi Artist, with years of creating stunning designs for brides, I share these tips to help you nail perfect wedding henna every single time. Let's dive into the steps that make the difference.
Preparation is Paramount – Setting the Stage for Deep Color
Good prep sets the foundation for henna that pops. Skip this, and even the best design fades fast. Brides often overlook it, but it boosts the stain's depth and hold.
Client Consultation and Design Selection Strategies
Talk with your bride early. Book a consult weeks before the big day to chat about her vision. Ask if she wants traditional floral motifs or something modern with geometric twists.
Understand her style—does she prefer heavy coverage on both hands and feet, or light touches just on palms? Set clear expectations on time; a full bridal set might take 4-6 hours. This avoids last-minute stress and ensures the design fits her gown and theme perfectly.
Manage complexity too. Simple patterns stain deeper than dense ones. Show sketches or photos to pick what suits her skin tone and the event's vibe.
Skin Priming Techniques for Maximum Uptake
Clean skin absorbs henna best. Start with gentle exfoliation using a sugar-lemon scrub two days prior. This removes dead cells without irritating the surface.
Avoid oils, lotions, or perfumes right before application—they block the dye. Opt for natural primers like a thin layer of mustard oil 24 hours ahead; it preps pores for better uptake.
For extra boost, apply a mix of tea water and fenugreek powder as a mask. Let it sit for 20 minutes, then rinse. These steps prime the skin for that rich, even color brides crave.
Essential Aftercare Instructions for Deep Staining
Aftercare locks in the magic. Right after applying the paste, coat it with a lemon-sugar mix using a cotton ball. This sealant keeps it moist and draws out the dye.
Keep the paste dry—no touching water or sweat for 8-12 hours. Wrap hands loosely in plastic if needed, but don't make it too tight. When time's up, scrape off the dried paste gently with a dull knife; never wash it away.
Follow up by avoiding soap and scrubbing for 24 hours. Dab on clove oil at night to deepen the stain. These habits turn a good application into a lasting masterpiece.
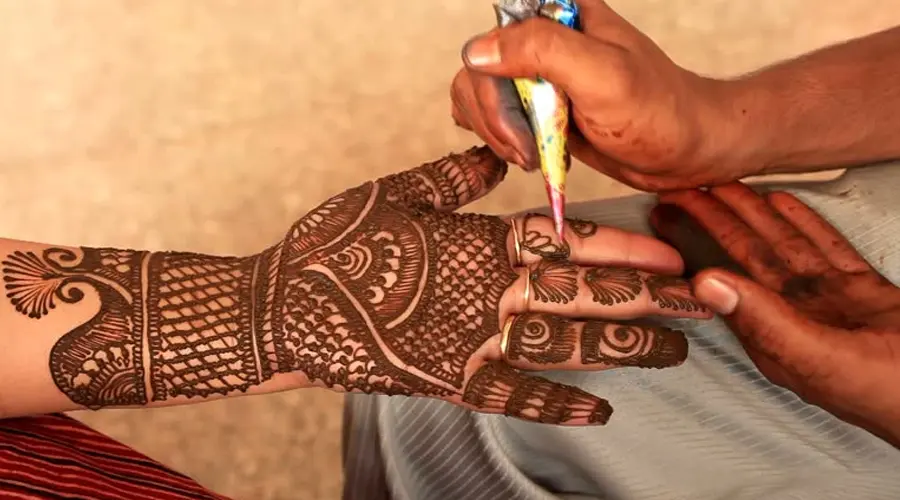
Mastering the Cone – Application Techniques for Flawless Lines
The cone is your brush in mehndi art. Hold it wrong, and lines wobble. Practice these moves for bridal designs that wow.
Selecting and Preparing the Perfect Henna Paste
Quality paste makes all the difference. Use pure henna powder from trusted sources—avoid cheap mixes with chemicals. Mix it with strong black tea, lemon juice, and a pinch of sugar for the right sticky texture.
Aim for a smooth, yogurt-like consistency for easy flow. Add essential oils like eucalyptus or tea tree last; they scent the paste and help the stain develop faster. Let it rest overnight— this "dye release" turns it ready for deep red-brown hues.
Test a small batch on paper first. If it pipes cleanly without lumps, you're set for intricate bridal work.
Grip, Pressure, and Flow Control for Consistency
Grip the cone like a pen, but relaxed. Pinch the top with your thumb and fingers, leaving room for paste to flow. This setup gives you control over every twist.
Apply steady pressure—light for thin lines in paisley tips, firmer for bold fills. Practice on your hand to feel the rhythm; even flow prevents blobs or gaps in those delicate jali patterns.
Twist the cone slightly as you go. It keeps the nozzle clear and lines sharp. Brides notice these flawless details in photos that last a lifetime.
Speed vs. Precision: Pacing for Bridal Appointments
Big designs demand balance. Full bridal henna on hands takes about 2 hours per side; feet add another hour. Start with outlines, then fill in to save time without rushing.
Break it into stages—palms first, then backs. Take short pauses to check symmetry. Under pressure, focus on key areas like the bride's ring finger for that photo-ready pop.
If the schedule tightens, simplify non-focal spots. Precision wins over speed every time; a rushed job shows in uneven edges.
The Curing Process – Unlocking the Deepest Red-Brown
Curing is where henna works its charm. Rush it, and the color stays pale. Patience here pays off big.
The Critical Importance of Dwell Time
The paste needs time to oxidize. Lawsone, the dye in henna, bonds with skin proteins slowly. For bridal perfection, leave it on 8-10 hours—overnight if possible.
Shorter times give orange shades; longer ones build that deep mahogany. Hands cure faster than feet due to better blood flow. This wait turns temporary art into a wedding keepsake.
Track it with a timer. Most brides see peak color by day two, but dwell time sets the stage.
Heat Application and Sealing Methods for Longevity
Warmth speeds up the process. Use a hairdryer on low for 10-15 minutes post-application; it helps the dye penetrate without drying out the paste.
Seal with natural balms like shea butter after scraping. Or wrap in cotton cloth overnight. These keep moisture in, promoting even curing.
Avoid direct sun— it can fade spots. Gentle heat methods ensure the stain lasts 2-3 weeks, through honeymoon glow.
Avoiding Early Removal Disasters
Brides tempt fate by washing too soon. Water dilutes the dye before it sets. Stick to dry activities for the first day—no dishes or swims.
If itch hits, pat with a dry cloth; scratching flakes the paste early. Plan around it—apply evening before the ceremony for full cure by morning.
Common slip: lotions too quick. Wait 48 hours. Dodge these, and your henna shines bright.
Troubleshooting Common Henna Failures
Issues pop up, but fixes exist. Spot them early to save the day. Here's how to handle bridal henna hiccups.
Dealing with Fading or Patchy Early Stains
Patchy orange means uneven dye release. In the first day, rub gently with a mix of lemon juice and sugar. It revives faded areas without harm.
Apply Vicks VapoRub lightly—its warmth boosts circulation. Or dab eucalyptus oil for a natural lift. These remedies even out the stain before it darkens.
Monitor closely; most patches fill in by day three. Act quick for bridal timelines.
Managing Skin Sensitivities and Reactions
A slight tingle is normal from natural acids. But watch for red swells or itch—that signals allergy. Always patch test 48 hours before on the inner arm.
Steer clear of cones with PPD; it's a chemical that causes bad reactions. Use 100% natural for sensitive skins. If trouble starts, rinse with cool water and apply aloe.
Educate brides on signs. Safety first keeps the wedding stress-free. For more on safe beauty routines, check beauty blogs examples.
Stain Development Timeline: What to Expect Day-by-Day
Day one: Bright orange appears as the paste comes off. It's temporary—don't panic.
Day two: Shifts to reddish-brown as oxidation kicks in. Hands darken first.
Days three to five: Peaks at deep burgundy. Feet might lag a bit.
By week two, it fades gradually. This timeline eases worries, letting brides enjoy the process.
Conclusion: Your Masterpiece Secured – Lasting Memories in Henna
Perfect wedding henna boils down to three keys: solid preparation, ample dwell time, and strict aftercare. Nail these, and you'll get that signature deep stain every bride dreams of. As Raju Mehandi Artist, I know technique and care create art that tells a story.
Hire a pro if you're new—dedication shows in every curve. Try these tips for your next event, and watch the compliments roll in. Your henna will capture the magic of the moment forever. Book a session today and step into bridal beauty done right.